
Grouping is an important function that helps you control who has access to which people's information. Groups are created by a Teamworks AMS administrator using the Groups tool. You can search groups by their name or their description using the options in the collapsible sidebar.
The Groups tool allows you to group people for data entry, notification, reporting and planning purposes. People can be grouped, for example, by sporting discipline, class, year, age, gender, or team.
The names, members and other properties of the groups that are used on an AMS site should be decided according to your organization's needs.
Groups cannot be linked between sites on an enterprise server.
Structuring groups with parent and subgroups
Groups can have sub-groups and parent groups. A group can only have one parent group but it can have as many sub-groups as necessary. In turn, each sub-group can be a parent group for another set of groups.
Coaches of a parent group are able to access all members of the immediate group, as well as all of its sub-groups. Therefore, when assigning users as athletes of a sub-group, try to assign them to the smallest iteration of the group as possible.
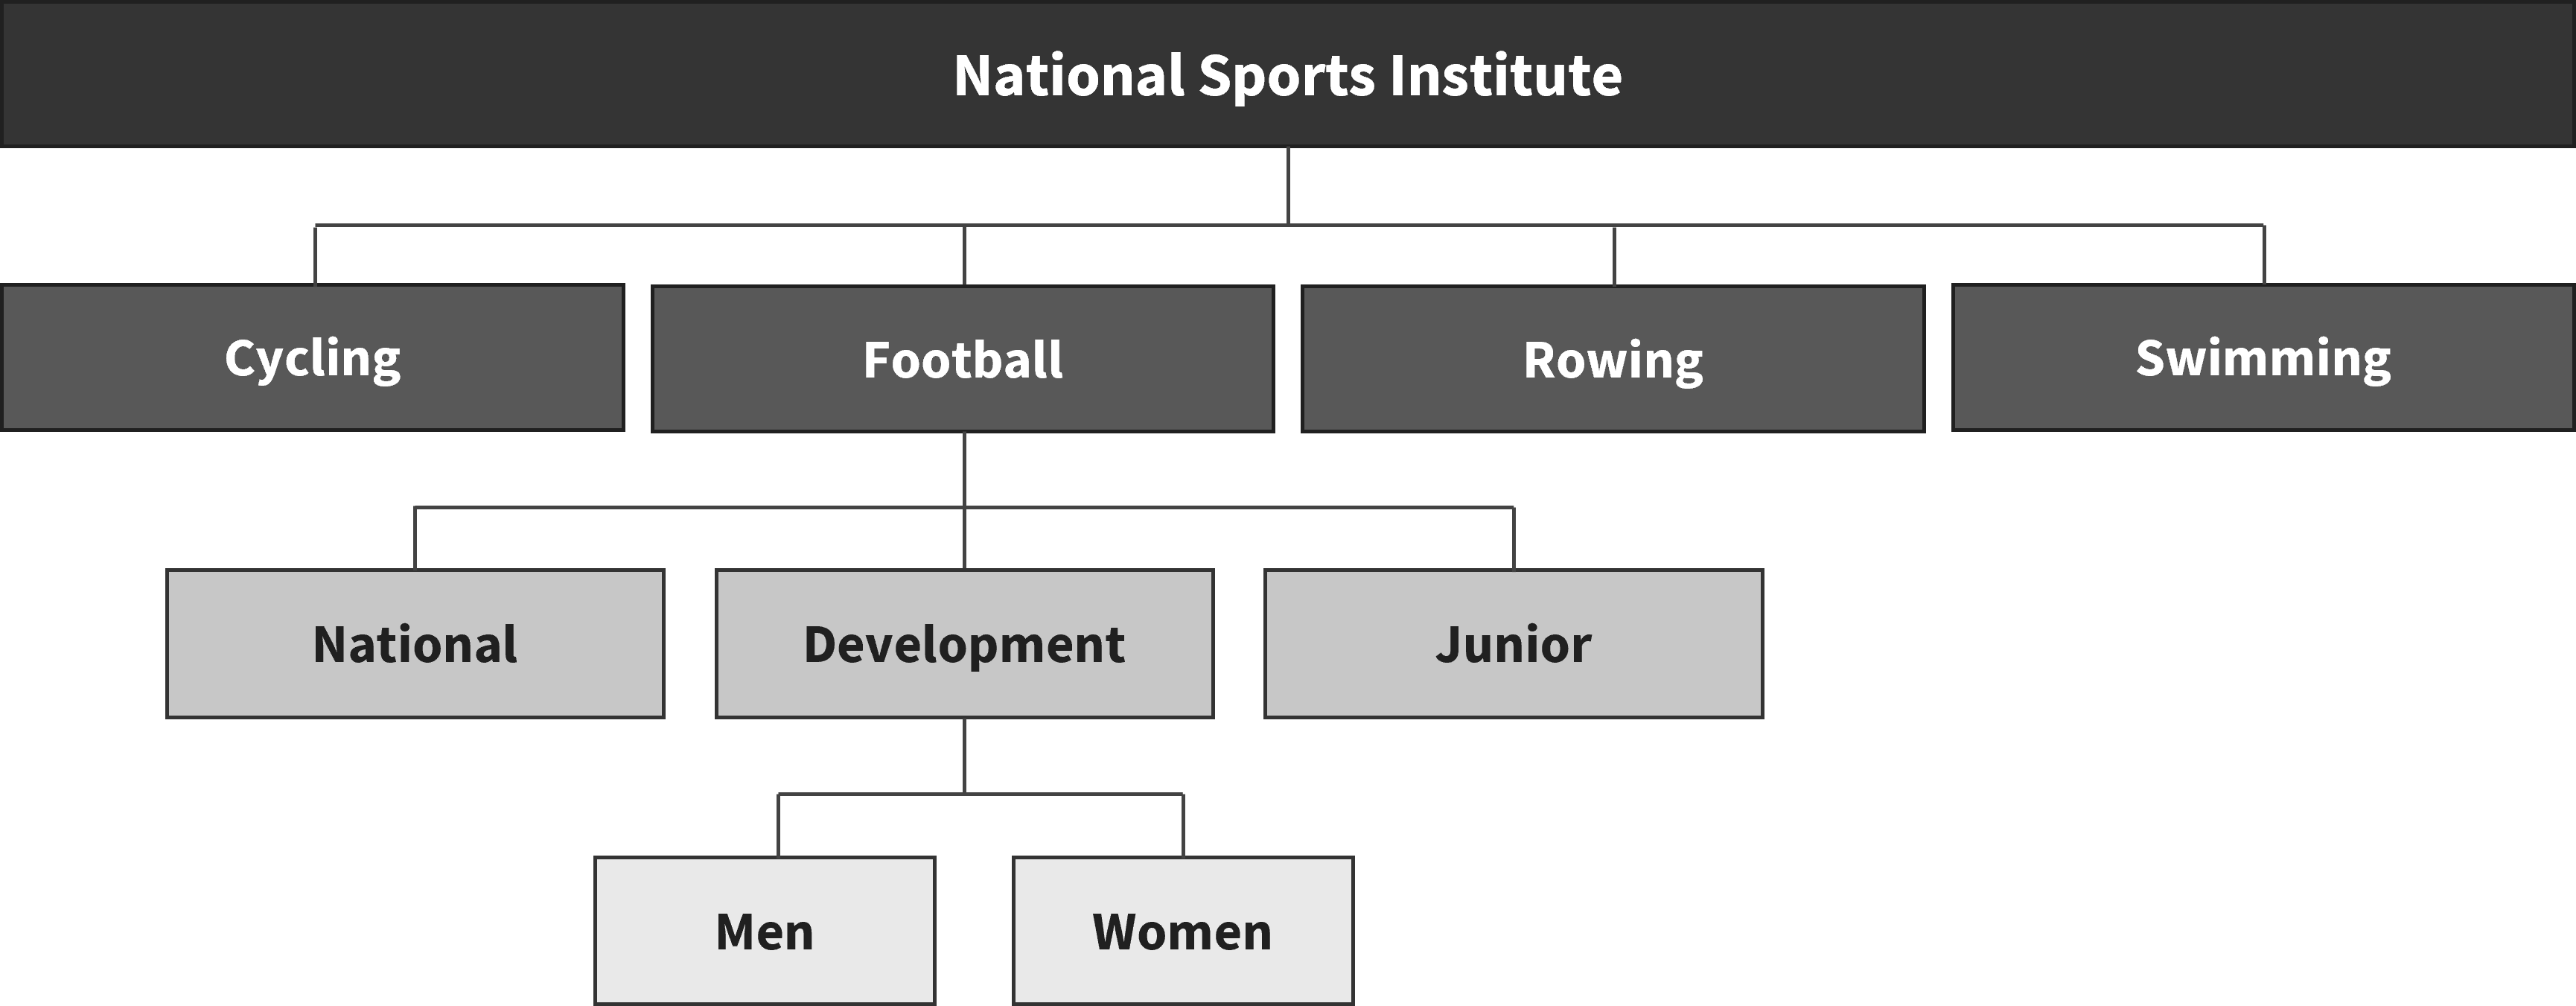
The diagram above shows an example of how a National Sports Institute may group their athletes. There is a group for each sport which in turn has sub-groups for the different squads (only the football sub-groups are shown above). These squads are broken down further into men's and women's groups. A coach of the Football group is able to access all athletes in the Football group as well as those in any of its sub-groups. An athlete in the women's development football squad only needs to be a member of the Women group. She could also be a member of the Development and Football groups but it can be easier to manage user accounts when they're only assigned to the lowest relevant sub-group level.
To rearrange the grouping structure, ensure no groups are selected in the search bar, then drag and drop groups to the required positions.
Level of access to a group
A group is made up of coach and athlete members. People can be coaches and athletes within multiple different groups.
- As a coach of a group, someone will have access to enter and view information for any athlete members within that group, depending on their role permissions. They cannot see data about themselves or any other coaches of that group.
- As an athlete in a group, someone will have access to enter and view information for themselves only, depending on their role permissions. They will not be able to see anything related to the other members of the group.
- In some circumstances, someone may be a coach of one group but an athlete in another. In this situation the normal behavior applies based on which group they have loaded:
- If they load the group that they're a coach of, they'll be able to see information for everyone in that group.
- If they load the group they're an athlete in, they'll only have access to their own information
Groups must be assigned cautiously. It is important to ensure that people are allocated to the correct group and have the appropriate level of access to the group (either as a coach or athlete).
A third level of access is as a group admin. This is for people who have partial administration access to manage the group members. For more information on this level of access, see our article on Team administrators.
Each group member’s access level is listed in the Access column and can be updated using the dropdown menu for each user. Note that user accounts can be assigned all access levels within a group.
Managing groups
Groups are listed in alphabetical order with subgroups nested within parent groups, if applicable. Type a group name into the search bar to find it; if it is a subgroup, the relevant parent group(s) will expand so you can find it within the grouping structure.
To edit the group name or description, open the group then select the name or description. Type in the updated details, then use the Enter key to save the change. Alternatively, you can update the group name by hovering over the group to reveal the more options menu, then select Rename.
To delete a group, hover over the group to reveal the more options menu, then select Delete. This action will delete the group but not the user accounts assigned to it. If the user accounts were not assigned to any other groups, they will not be able to log into AMS until they have been reassigned to another group.
To manage other configurations such as page layouts, system messages, Smartflows and Smartsaves that are applied to the group, open the Details tab. You can add or remove these settings in the dropdown menus.
Assigning users to groups
To manage the group members, open the Members tab to see all of the user accounts that have been assigned to the group. You can search for a user within the group with the search bar, sort the list by account name and filter by account details (username, UUID, email address and date of birth) or the user’s level of Access to the group (Athlete, Coach or Admin).
To add one or multiple users to a group, select the group you want to add them to, then select Add. If necessary, use the search bar to filter the list then tick the box next to the account(s) you want to add. You can search by name, username, UUID or email address in the search box.
If we wanted to add two athletes (e.g. Jack Smith and Jamie Anderson) to the group, we could search for and select Jack Smith, then change the search condition to search for “Jamie” and select the account. Selections will be retained while the sidebar remains open, even if the search conditions are changed. The number of selected accounts is shown below the search box.
Use the dropdown menu to choose whether the users should be added to the group as athletes, coaches or group admins then select Add selected.
Steps to create a new group
- From the administration interface, select the Groups tool.
- If the group is to be a subgroup of an existing group, select its parent group. If the group is to be a parent or stand-alone group, you do not need to select a group.
- Select New.
- Name the new group.
- Provide a description of the group, if necessary.
- If necessary, drag and drop the group into its correct place within the grouping structure.
- Add group members in the Members tab by using the Add button.
- Assign page layouts, system messages, Smartflows and Smartsaves to the group in the Details tab.