Scheduled data workflows are only available on the web version of Teamworks AMS and the Smartabase Classic mobile application.
Scheduling is used to plan interactions between users and related entities that can incorporate multiple athletes at once (e.g. a training session for multiple athletes at a training venue). Events can be scheduled within Scheduling forms are another type of event form and are created in the Event forms tool. In contrast to other event forms, scheduling forms can only be entered via the Enter scheduled data tool or the Related entity calendar tool. Scheduling forms can be accessed via AMS on a web browser and you cannot import records into them. If a user is given read access to the scheduling form, and a booking is made for them, they will be able to see it in their Calendar even if they do not have access to the Enter scheduled data tool. All draft scheduled events are only visible in the Enter scheduled data and Preview schedule (and related entities calendar?). This means that a professional user could create scheduled events for the entire week and save the events as draft data while they are planning the schedule, then publish all of the events with one button once finalized.
Steps to create a scheduling form
Prior to creating the appointment form, ensure that you have created a related entity form for this workflow. This related entity is the room, studio, provider etc. that the appointment will be booked against.
- Open an existing event form or create a new event form in the builder interface.
- In the form advanced properties, set the Event type as a Scheduled event.
- Set up the additional advanced properties for scheduling forms:
- Interval length: define the length of intervals between scheduled events.
- Event length: define the default length of the scheduled event, rounded to the nearest 15 minutes. When used in conjunction with the Allow length override setting set to No, only a specific time can be booked.
- Allow length override: define whether people should be able to override the Event length and change the end time of the scheduled event.
- Forward and Backward entry limits: determine how many days forward and backward are available to book scheduled event for in the Smartabase Classic mobile calendar and Enter scheduled data .
- Limit entries: define whether there should be a limit on how many scheduled event can be booked in a period of time.
- Show name in calendar: define whether to show or hide the name of the event in the Calendar tool. In most instances, this should be set to Yes to identify what the record relates to.
- Schedule calendar summary override: define which field should be displayed in the calendar summary for this event.
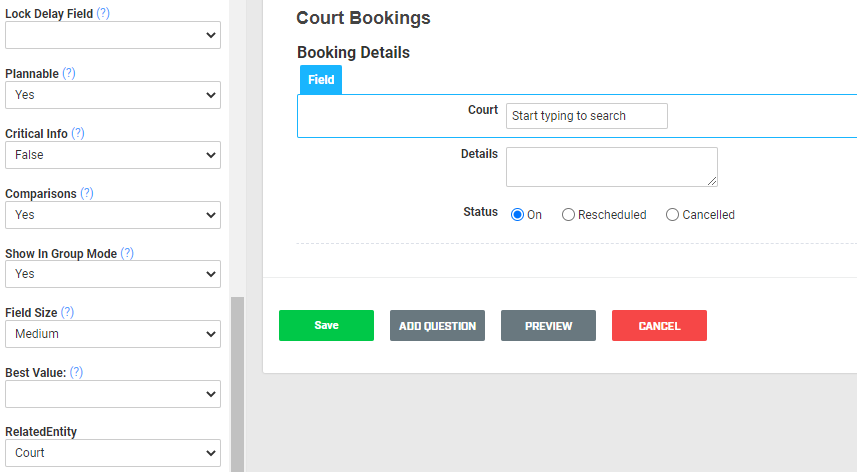
- Add a Related entity field.
-
- Name the field the same as the related entity form that it will reference. For example, if the related entity form is named Doctor, the Related entity field should also be named Doctor.
- In the advanced field properties, select a related entity form in the Related entity setting.
-
- If you require more than one Related entity field (e.g. one Related entity field for the doctor and another for the consultation venue), repeat step 4 to add additional fields to the form.
- Add a Single selection field named Status to denote the scheduled event status.
- List On, Cancelled and Rescheduled as the options. Do not use different options as they will not correctly reflect availability.
- In the field’s advanced properties:
- Set the Denotes schedule status property to Yes. This enables the scheduled event to show as on, cancelled or rescheduled and means that the related entity is shown as available if a scheduled event is cancelled or rescheduled. The form must only contain one field with this setting enabled.
- Set the Default value property to On.
- Add any other fields that are required in the appointment form. These will be dependent on the information that you need to track but could include a Paragraph text field named Details to list appointment details and a Single select field named Appointment Type with New issue, Follow-up and Other as options to provide the practitioner with information about the reason for the scheduled event.
- If any of the fields should be shown in the calendar, be sure to set the advanced property Calendar summary field to True.
- If you have enabled the calendar tooltip, check that you have set it up correctly to meet your needs.
- Set up the form save properties.
For more information about how to schedule events, check out our article on Scheduled data.