![]() Available to users with the Enter data system permission in their role.
Available to users with the Enter data system permission in their role.
One of the main ways that people interact with Teamworks AMS is to enter data into event forms. Event forms are used to collect and store chronological data to help understand and analyze trends over time. Event forms may contain a range of field types to capture data. Some fields will require a numeric response, others may provide a space to write a sentence or you may need to select a response from a list of options.
The web version of AMS is optimized for use on a laptop or computer and is ideal for more complex workflows and reporting. The AMS mobile app can be accessed via a mobile or tablet device and is well-suited to people who need to access data on-the-go.
Selecting an event form
To get started with data entry, you need to select an event form to add the data to and choose who you're entering data for.
Web
Mobile App
Athlete App
Kiosk App
There are several places to enter data from with AMS on the web:
- The Enter data tool: This is accessible as either a button on your home page or a menu option in the navigation bar).
- The calendar.
- The sidebar.
Select a user and then choose a form to fill out. If there are more than 100 users, the first 100 will be shown by default, with the ability to display more. You can find a user with the search box.
On the form selection page, event forms that you can create new records for are grouped by the form category. There’s a search field where you can type in the name of the form you’re looking for. Depending on how your site is configured, your form selection page may appear with either the classic or modern interface.
-
Classic interface: your favorite events are listed at the top of the page. Beneath that, the Show | Hide buttons toggle a list view of the forms you have access to. If you just want to see the grid view of all forms, you can use the Hide setting.

-
Modern interface: all event forms that you have access to are shown by default. To filter the forms shown, you can select a form category from the sidebar or use the search field.

To open a blank form, just select the name of the form. If you’re searching for a form by typing its name into the search field, AMS will automatically open a form when there’s an exclusive match for your search term. So, for example, if you have forms named Daily diary and Daily training, AMS will automatically open the Daily training form once you’ve typed "Daily T".
You can select an event form from one of several places:
-
The Favorite event forms widget on your customized home screen.
-
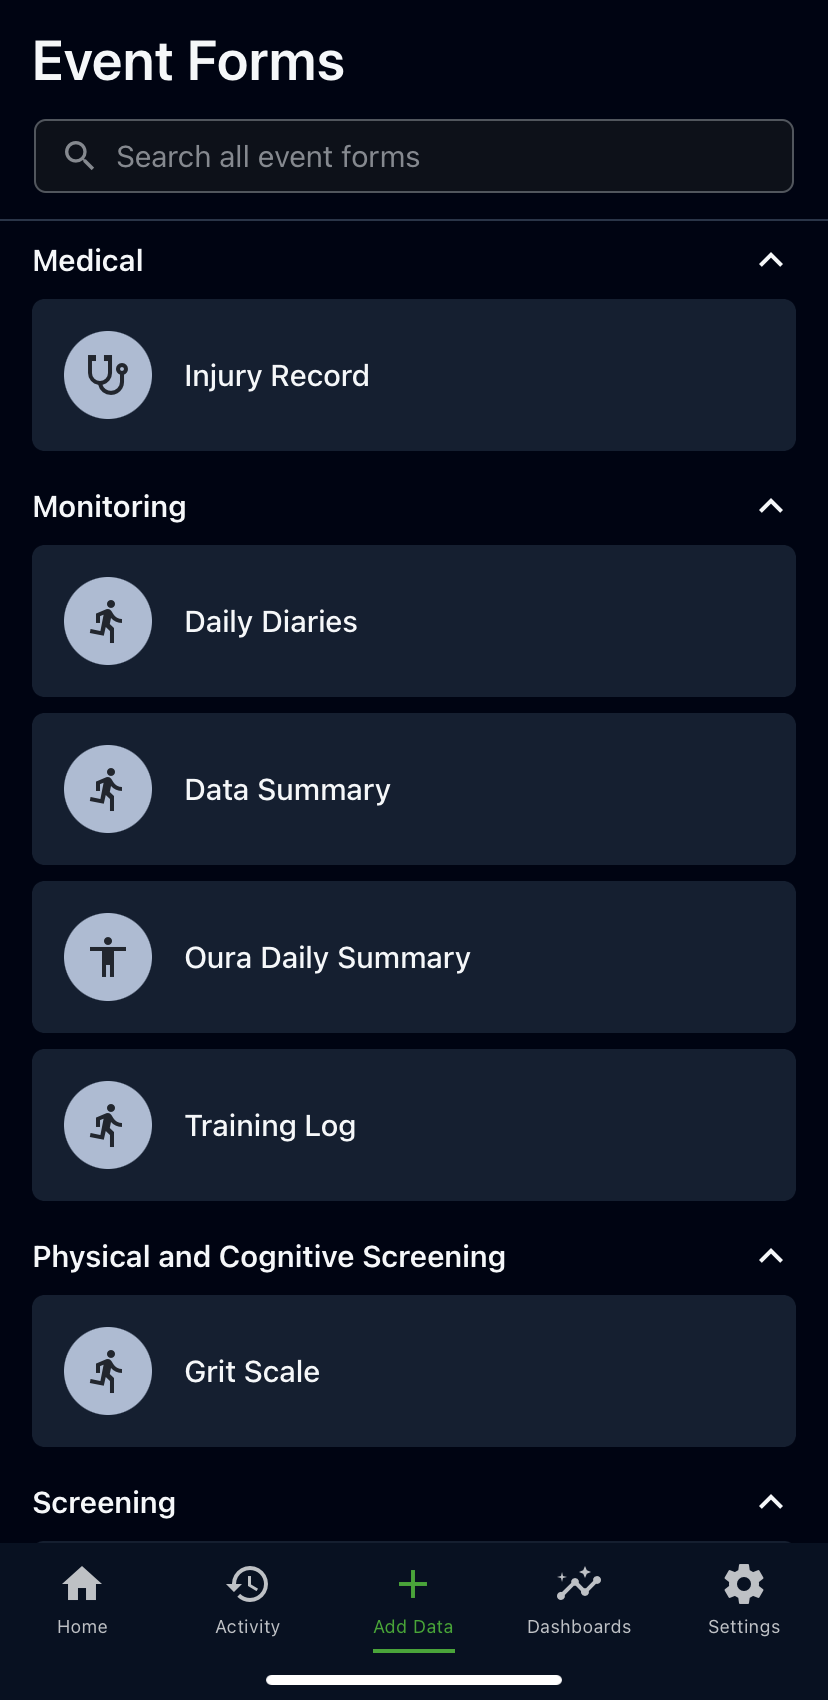
The Add data tab.
-
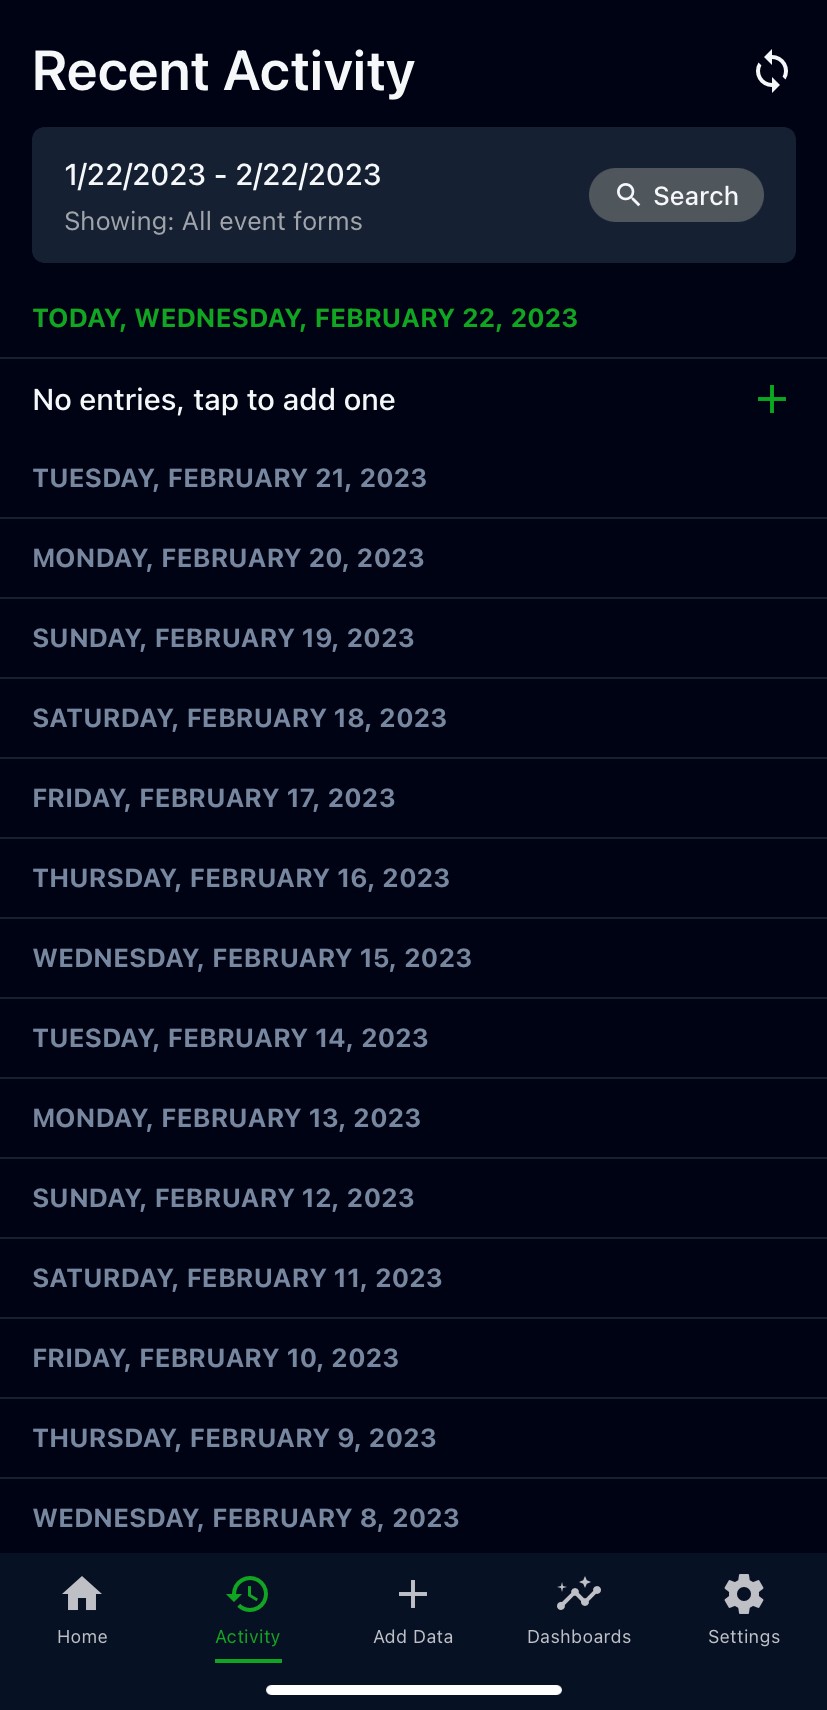
The + icon in the Activity tab (non-professional users only).

If you are entering data against your own account, selecting the form from the Favorite event forms and data entry tab will open a blank form for you to enter data into.
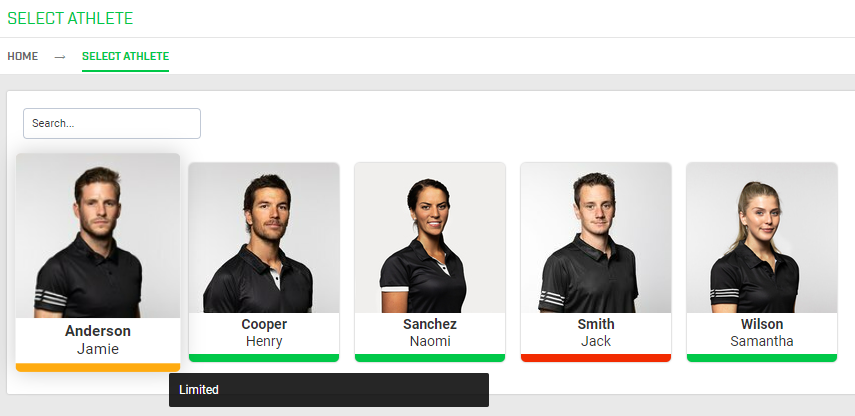
If you are entering data against someone else’s account or using kiosk mode, you will be prompted to select an athlete from the currently loaded group. By default, you will need to select the person you want to enter data for and then select the event form; however, you can reverse this flow by going to Settings > App preferences > toggle off Athlete first data entry workflow.
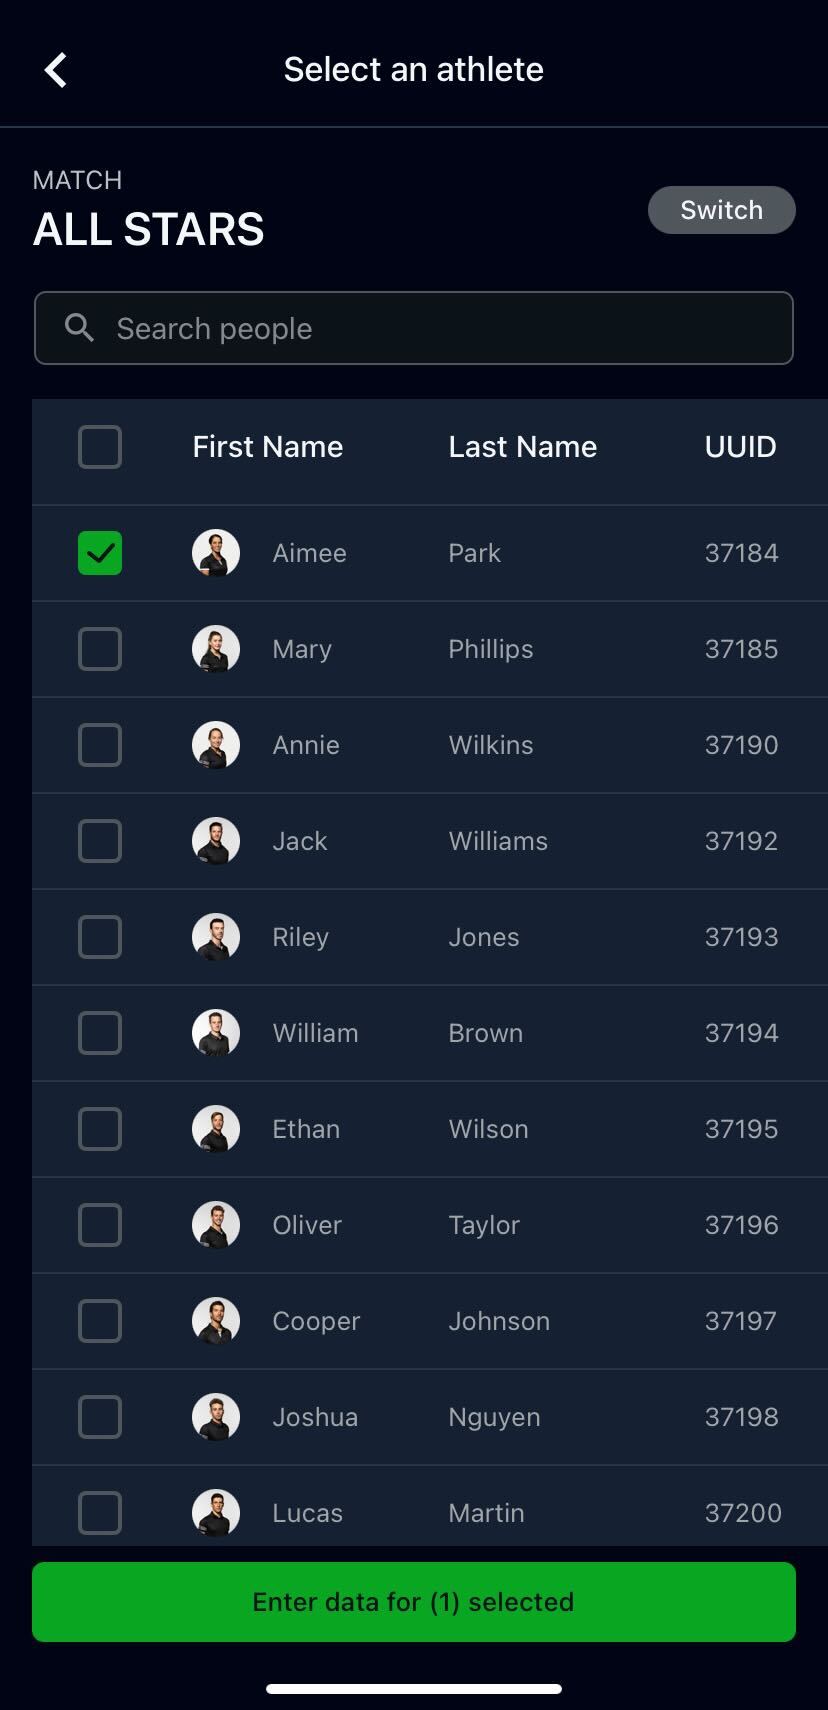
When selecting an athlete, use the search bar or scroll through the list and select the relevant account name. If you need to change the group, use the Switch button at the top of the screen.
If using kiosk mode and expected entries have been configured (unless an Unlimited number of entries has been selected), the Completed column shows whether the athlete has met the expected entries (green tick icon) or records remain. In the example below, one athlete has completed the number of completed entries, while the other athletes have entered 0 out of 1 expected entries. Use the Show button to filter the athlete list by those who have and have not completed all entries.
Once you’ve selected the correct person to enter data for, tap the Enter data button at the bottom of the screen.
If you have coach access to a group, you may be able to select multiple users to enter data in group entry mode. In kiosk mode, data can only be entered for one user at a time.
You can select an event form from one of several places:
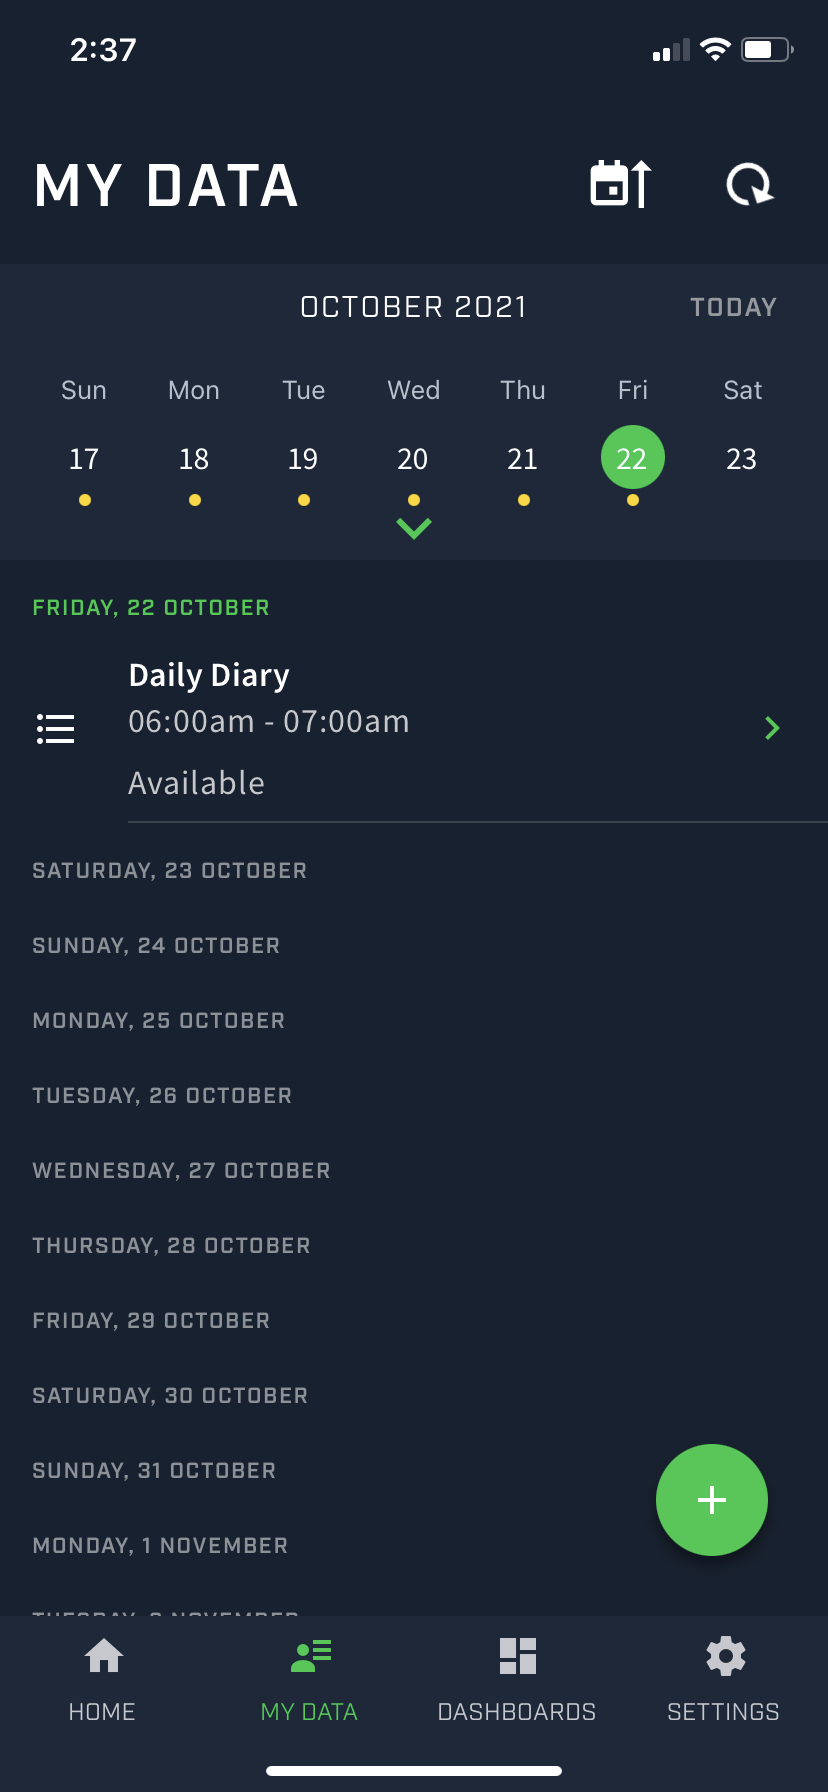
- The Add data button on your home screen.
- The Favorites section on your home screen.
- The + icon on the My data screen.

When you use the Athlete app, you’re always entering data about yourself so there’s no screen where you choose a person to enter data about.
If you are using the Athlete app offline (i.e. no internet connection), you will only be able to select event forms that you downloaded to the app while online. For more information on how to prepare your device for offline use, check out our article on using AMS offline.
We're replacing the Kiosk app with the AMS app and, as a consequence, support will be discontinued as of December 2023. To continue to use the kiosk service, please download the AMS app and migrate this site set-up.
Filling out a blank record
When you create a new record, the date and time of the record is shown at the top of the form. A new record defaults to the date and time you created it, but you can select and adjust these if you need to. Usually, you would expect the time and date to reflect either when the event occurred or when you entered the data.
In some cases, it may be mandatory for a value to be entered into a specific field before the record can be saved. This configuration is usually done to maintain the integrity of the data and ensure that necessary information is collected. If there are any required fields in the form, they will appear in red text and a warning message will be displayed at the bottom of the form until they are complete.
You may also find that some fields already have a response filled out. These fields may have been configured to automatically use the last value that you entered or to populate with a default value, but you can still change these values.
In some instances, you may not be able to edit a field. This may be because it is a calculation or the field may be restricted to people with specific permissions.
Web
Mobile App
Athlete App
Kiosk App
When entering data with AMS on the web, you may have additional features available to you to assist with entering data, including the following:
You can also show or hide any form instructions (if applicable) and undo changes with the respective buttons.
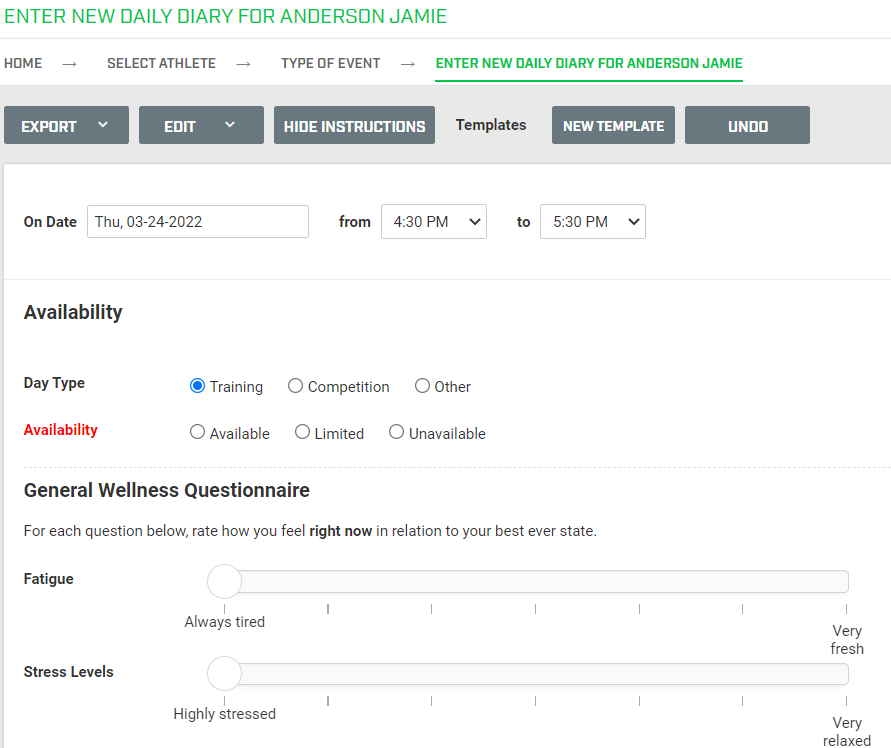
You may also be able to export data as a PDF or CSV file, or download any attachments. If you have access to at least two of these options, you can find them in a drop-down menu by hovering over the Export button.
You may also have permission to delete the record.
Filling out a new form is very similar to using AMS on the web, although the appearance is modified for use on a mobile device.
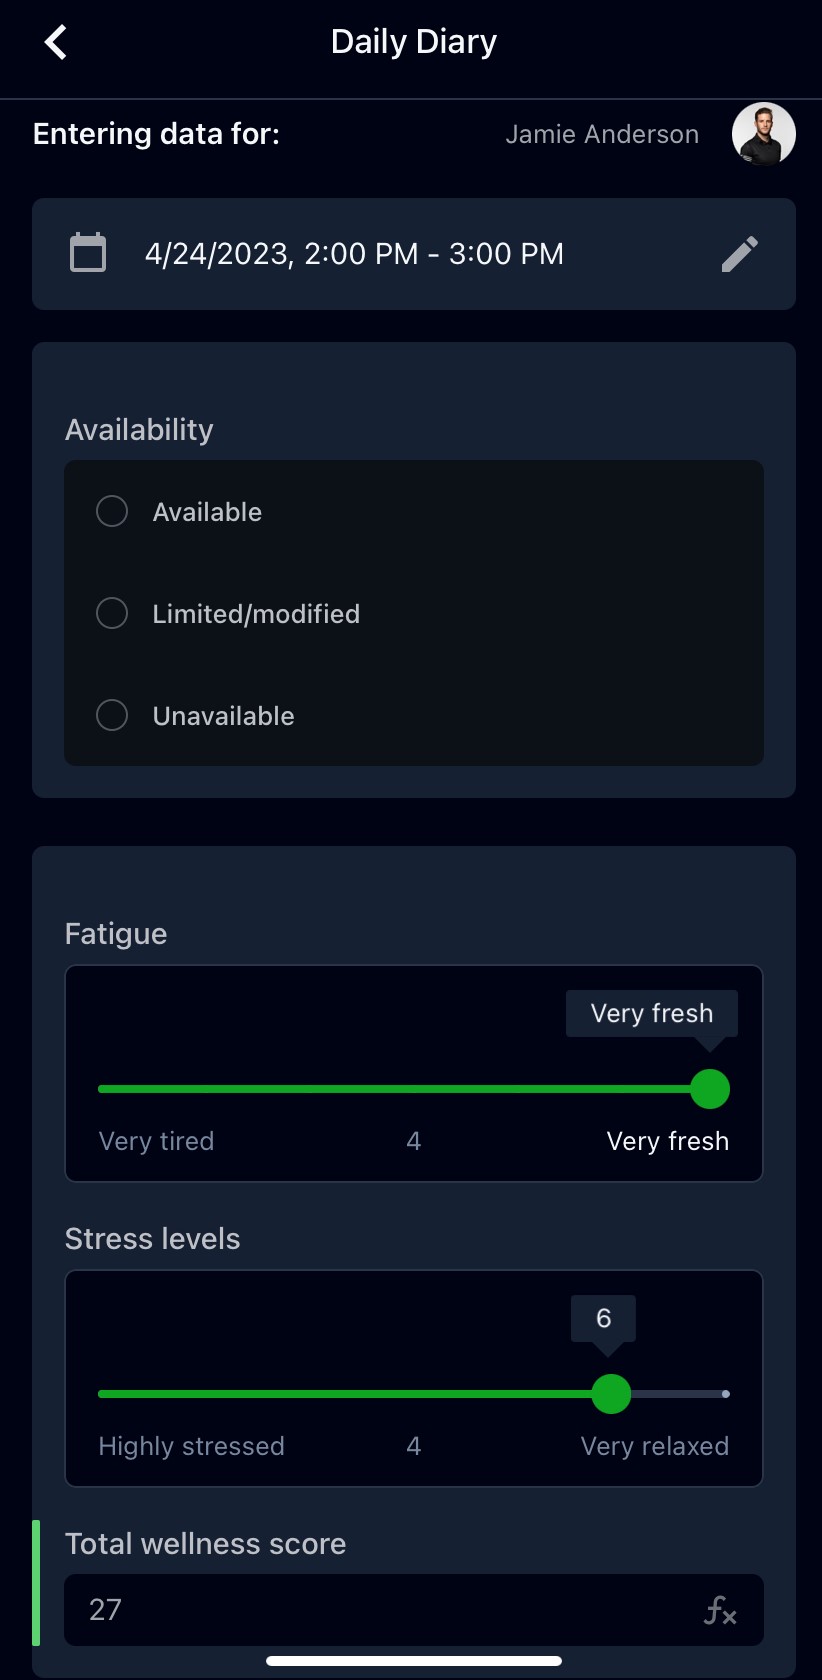
If the cell is for a calculation field, a calculation icon will be shown next to the field name and you will be unable to enter a value.
If the form contains a signature field, the screen will switch to a landscape orientation while a signature is entered. This is the case for both mobile and tablet devices.
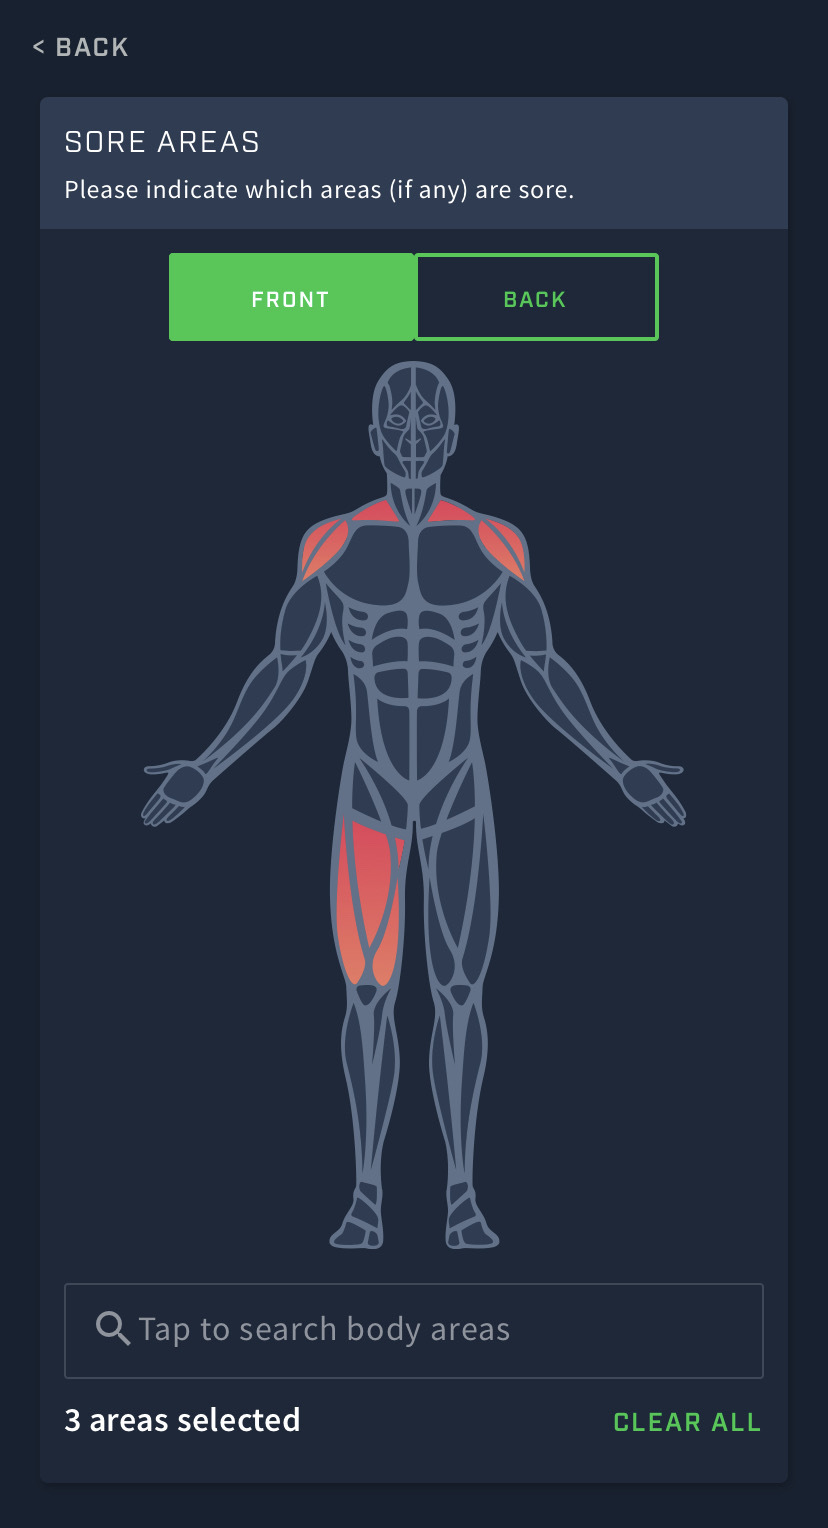
These screenshots show how event forms appear when viewed from the Athlete app. In these examples, the option fields and body diagram work just the same way that they do on the web, although their appearance is modified for use on a mobile device.
We're replacing the Kiosk app with the AMS app and, as a consequence, support will be discontinued as of December 2023. To continue to use the kiosk service, please download the AMS app and migrate this site set-up.
Entering data for a group
Group data entry is a means of entering data into an event form for multiple people at the same time. You must be a professional user to do this as it requires access to multiple people. The form must specifically be enabled for group entry, so you may not be able to use this feature for all of the event forms you have access to.
The data entry page will be displayed as a table, with the selected athletes listed in the first column and all of the event form field names appear as separate columns.
Web
Mobile App
The Enter Data for Group button on the web automatically selects all members of the current group you are viewing. If you want to enter data for a personal group instead, you can pick a personal group at step 3.
- Select Enter Data for Group.
- Choose the required group and group members.
- Click the Enter Event for [number] Athletes button.
- Select the relevant event form.
- Specify how many rows are needed per group member for any table fields.
- Select the date and time you want the event form to be recorded with.
- Enter data for the group members into the event form.
- If the event form is complete, click Save & Close.
If the event form is not complete, click Save Draft.
If the event form can’t be completed, click Cancel. - When group entry mode is exited, the reports tool will load.
Some useful functions become available when you enter data for a group:
- Clicking the Done button will take you to the next most appropriate cell for entering data; this can be the next cell to the right or the cell below.
- The Cancel button will deselect the current cell.
- The Clear button removes anything you have entered in the current cell.
- The Fill down button will take the data you have entered into the current cell and copy it to the remaining cells in the column. When you click Fill Down, a pop-up box appears with options for whether you want to copy the cell contents or the contents of the entire row. When selecting the option to copy an entire row you are also able to specify which row (or rows) you want to copy and which rows you want to copy them to.
- The Copy last button will copy the data from the cell immediately above the current cell into the current cell.
- The Paste from Excel button allows you to paste data from Microsoft Excel directly into the table. When you select this button a pop-up box appears with a blank field for you to paste the data you’ve copied from an Excel spreadsheet. For this to work you must have the data from Excel formatted in exactly the same way as the table columns. Be aware that how Excel displays data is not always the same as how it is stored, particularly with regard to decimal places, dates and times.
In some instances, you may see some highlighted tabs at the top of the data table in group entry mode. These tabs represent different sections of the event form and are set up by your AMS builder. Tabs that are highlighted are currently visible. To show or hide the different tabs, click on the tab name.
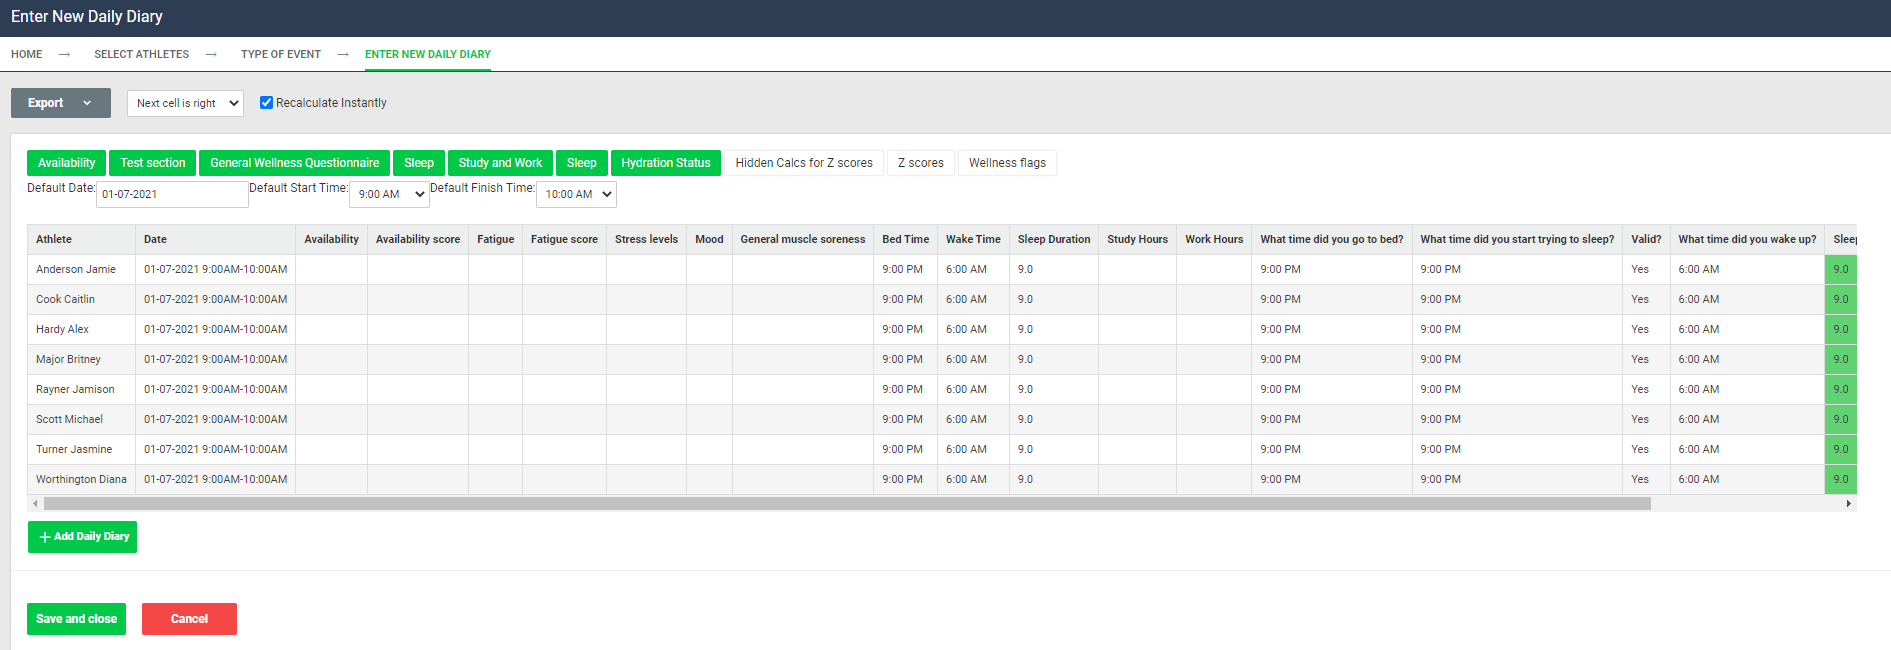
In the example above, the sections called Hidden Calcs for Z scores, Z scores and Wellness flags are not visible. Clicking on the tabs would highlight them and show the fields in the data table.
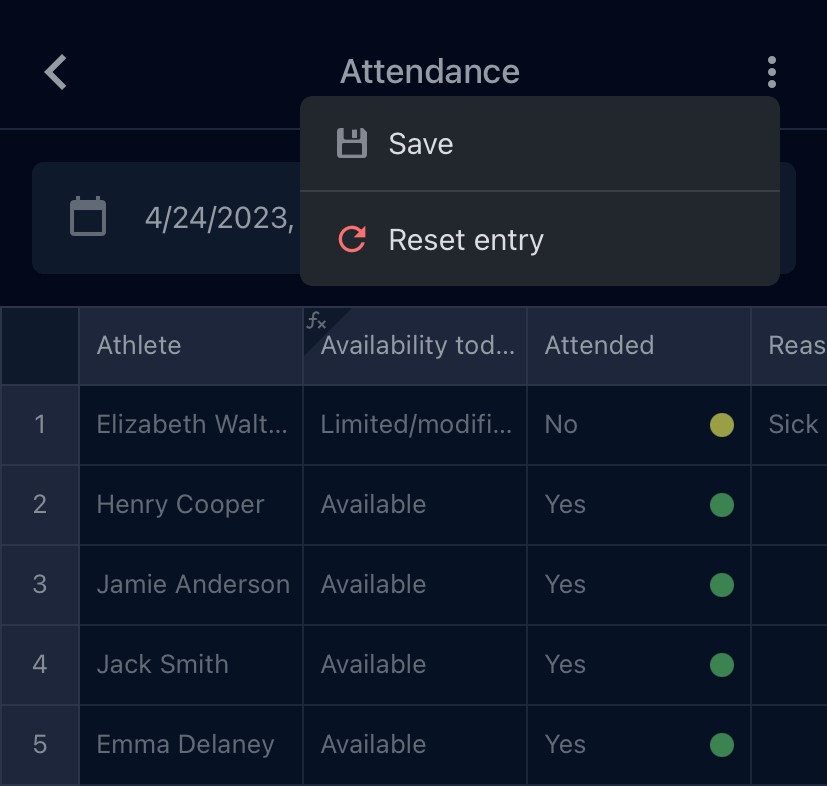
When entering data for a group, data is entered with a table. All selected users are listed in the first column of the table and the fields within the form appear as separate columns. Tabs shown at the bottom of the screen indicate each of the sections and tables within the form. If there are multiple sections and/or tables in the form, you can scroll horizontally through the tabs.
To enter data, tap into the cell and fill out the relevant response. If performance standards have been configured, a colored dot will appear next to the value.
In group entry mode, you can copy data entered for one user and apply it to all users in the data entry table. To do this, fill out all fields that you want to copy down for the first user in the table. Next, tap and hold the row number (1) to the left of the user’s account name. A pop-up will appear; select Fill down row. Alternatively, the Clear button removes anything you have entered in the current cell.
You can save the record by selecting the three-dot icon in the top right corner and then selecting Save.